Using Postman with OAuth
Getting a ShareFile Client Id and Secret
The first step will be to get a Client Id and Secret that is compatible with Postman. First navigate to our ShareFile API Key Generator.
On this page you will be able to log into your ShareFile account and you will be present with a web form.
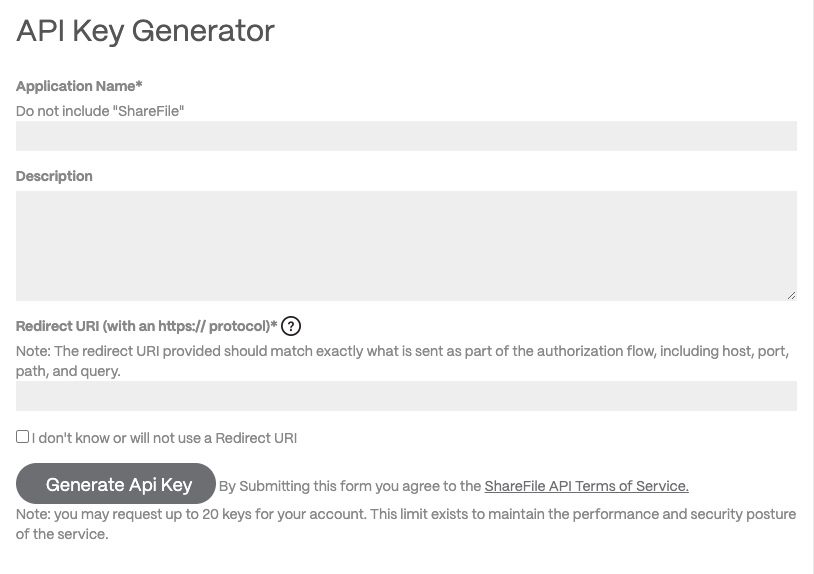
Make sure that the Redirect URI is set up to be used with Postman. Simply put 'https://www.getpostman.com/oauth2/callback' as your Redirect URI and then generate the key
Using Postman
Now that you have your Client ID and Secret you are ready to use Postman. Open up the application, click on new request, navigate to Authorization tab. Here, select the Type as OAuth 2.0 and enter the following values:
- Authorization URL: https://secure.sharefile.com/oauth/index.aspx?redirect_uri=https://www.getpostman.com/oauth2/callback
- Access Token URL: https://secure.sharefile.com/oauth/token?grant_type=authorization_code
- Client ID/ Client Secret: The Id and Secret generated on the previous step
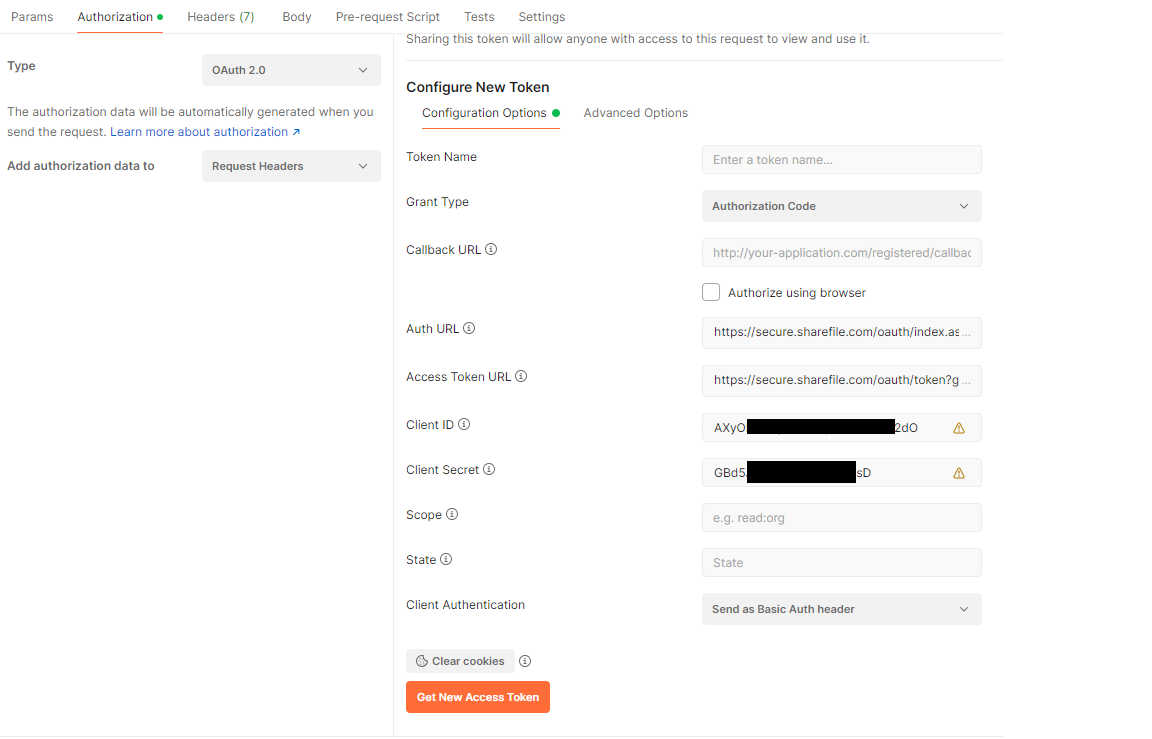 Once you’ve entered your values, click on “Get New Access Token” and you will get a ShareFile login prompt.
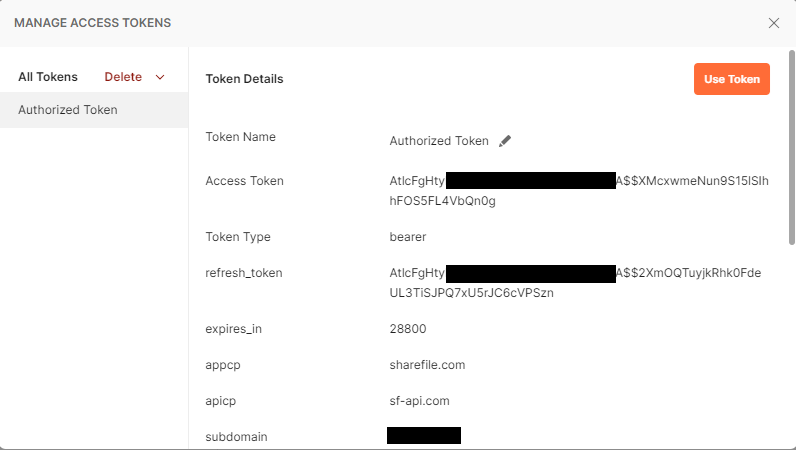
Enter your username and password and you will be redirected back to Postman with your access token and refresh tokens.
The token details will be displayed in the following form. Review & update the name of your token accordingly.
Once you’ve entered your values, click on “Get New Access Token” and you will get a ShareFile login prompt.
Enter your username and password and you will be redirected back to Postman with your access token and refresh tokens.
The token details will be displayed in the following form. Review & update the name of your token accordingly.
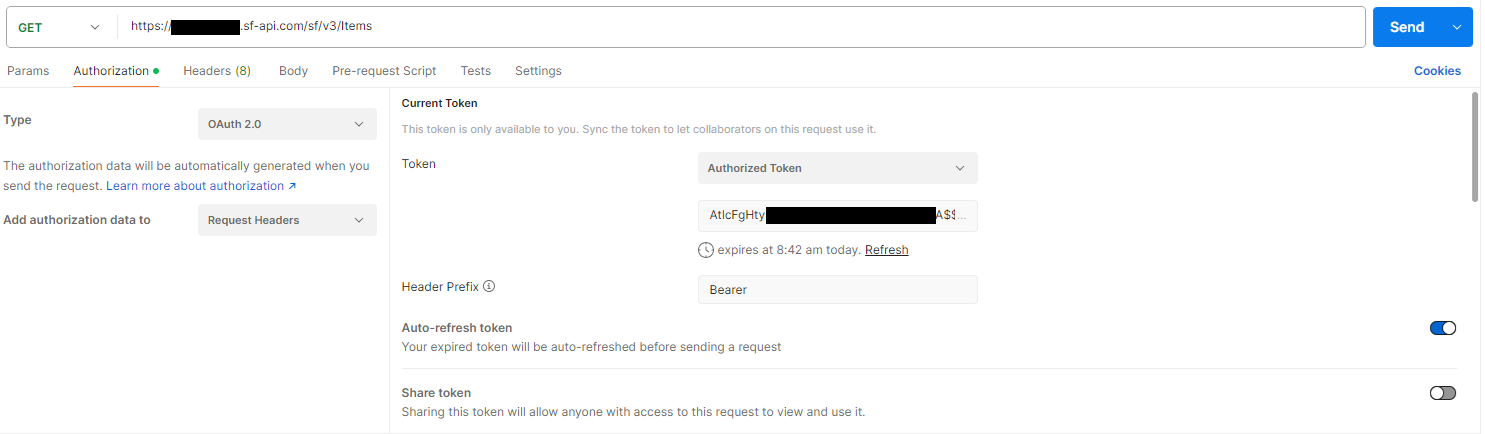
In order to execute a request you will need to add the token to your header; this will be an option once you have saved.
Click on the Authorization tab and set OAuth 2.0 as type. Select your token from the Available Tokens list.

This will add the Authorization Bearer to your query. Then you can add in a request url and hit send to execute.
You can try https://account.sf-api.com/sf/v3/Items as an example to start.